
Our friend and #Speedhunter Dino Dalle Carbonare is also driving a BMW 4series Convertible and started his Project Drop Top. Here you can read his story he already published at Speedhunters.com. Don’t you love it when a plan comes together? After months of looking at four stacked white boxes sporting the BBS logo in the corner of my office, the time had come to finally get them on Project Drop Top. I can’t say I didn’t enjoy taking one of the lightweight RI-Ds out and admiring it for a little while, before carefully repackaging it again and sealing it away in its box. I must have done that every week for a good two months, and it was beginning to eat at me from the inside out.

But I had to wait. There was no way I was going to fit a set of nice wheels on the 435i without lowering it first.

Then of course there was the other issue of finding the right sort of tyres to replace the awful run-flats that BMW likes to equip many of its cars with. I spent a great deal of time surfing BMW forums and picture galleries, and in doing so saw everything from the perfect fitment and stance, all the way to seriously terrible setups where the offsets were totally wrong, the tires were overly stretched on the rims and the cars sat too high.

I had nightmares of finding out that everything I had chosen for the car resulted in a crappy looking stance once it was all fitted. But the time to stop thinking about all this stuff had come to an end.

Last week, upon hearing that my set of Yokohama tyres had arrived at Studie AG’s Tokyo shop in the suburban area of Fuchu, I dropped the BMW’s top, stacked the BBS wheels on the seats and set off to get everything fitted up.

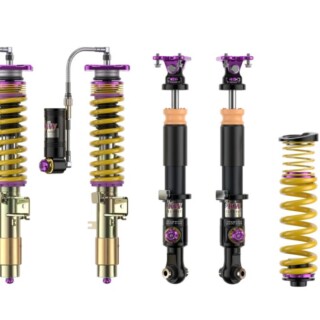
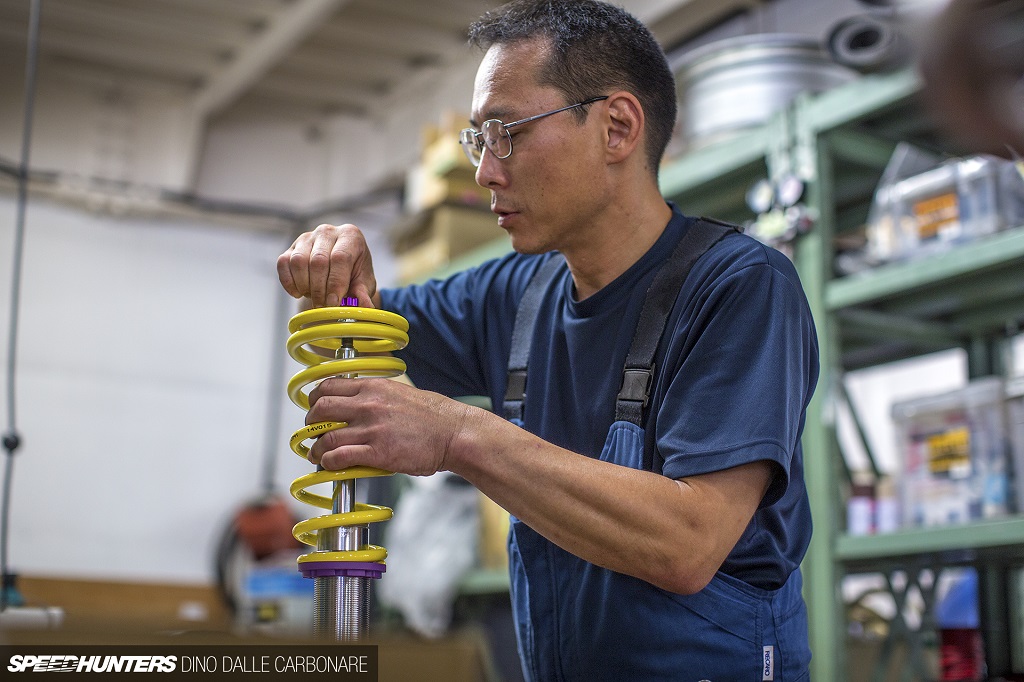
Stored away under the folded roof in the trunk was a key component of Project Drop Top’s planned setup – a set of KW Variant 3s, which you can see the Studie mechanics handling here (yes, they are heavy!).

Once the car was brought into one of the workshop’s four pits, work began immediately, starting off with a quick measure of the ride height to keep for the records.

The 435i was then lifted off the ground and the stock wheels removed.

Since picking the car up earlier this year I have only driven just over 3,000km. That might not sound like much, but seeing the car gets primarily used in the city, mileage is never going to ramp-up quickly. That’s why the original run-flat tyres still look brand new, and the wheels – which I coated the day the car was delivered – still look pristine.

While the stock wheels were being removed another mechanic had already brought over the set of Advan Sport V103 tyres that Yokohama kindly sponsored me with for this project.

The RI-Ds were then set on top, and at this point I was getting excited. Again, under the very knowledgeable advice of Bob Suzuki, the man behind Studie AG, I decided to go with 245/30ZR20 rubber for the 9-inch wide fronts and 275/30ZR20s for the 10-inch wide rears, even though he said that some fender ‘persuasion’ might be required. Sitting on the floor the setup was looking substantially wider than the stock Bridgestone Potenza S001 equipped 19s, and inside I just kept wondering if I had gone overboard.

With the wheels off, it was time to address the suspension. While the mechanics worked on removing the stock dampers and springs. I headed over to the work bench to check out the unboxing of the KWs.
Suspension First

As cool as the wheels were going to be when fitted (if they did fit!), it was the handling upgrade I was anticipating the most. The BMW’s stock suspension setup isn’t bad at all, and being of the M Sport variety it’s set slightly lower and a tad stiffer than what you get with the more luxury-oriented package. That said, it was still a little too soft and there was a bit too much roll for my liking. You really want decent mid-corner feedback and in that respect it wasn’t very precise. So that was something I was definitely looking to address, and KW, which also came in on the project, said I should give its Variant 3s a go.

The Variant 3 is part of KW’s street-oriented line up and features rebound and bump adustability (16 clicks for rebound, 12 for bump). As you can see above, the bottom part of the front coilovers is where the anodized aluminium bump adjuster is located.

And this is where you can find it on the rear dampers, right above the lower mounting point.

Rebound adjustments are made by using the included adjuster wheel which just slots into the top of each damper and is kept safe in the neat little plastic case that KW supplies with each of its kits. The case also holds a c-spanner tool for height adjustment.
Before being installed in the car, the mechanic ensured that each damper was positioned in its factory ‘middle’ setting for both rebound and bump. Once the stock dampers were removed, the top mounts from the fronts were removed with assistance from a spring compressor and moved over to the KW coilovers. Using the factory rubber-bushed mount is what retains the compliance that you need to have on a daily driven car. I’m sure a pillow-ball top mount with camber and caster adjustments like on KW’s Competition kits would look far cooler, but when you hit that first bump or road imperfection you are going to be regretting it!

Once that was done it was quickly over to the car. The right front Variant 3 coilover smoothly slipped onto its lower mounting point and was bolted in place on the suspension turret.

Job done.

At the same time the fronts were being tightened, the rears were going in too. As you can see above, at the back the springs mount separately from the damper.

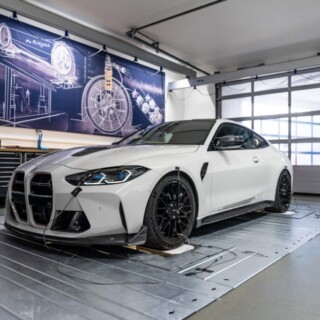
Within an hour of being driven into Studie, the 435i was already fitted with the KW Variant 3s. It really impressed me too, as I had never seen things happen so fast at a workshop! I was chatting to the mechanics and they told me that they are trained to work fast and efficiently, as on the weekend it’s not uncommon for Studie Tokyo to have 50 customer cars coming in for work. Yes, my mind was blown. Japan’s economy down in the dumps? I think not! And talking of cars coming in for work, it wasn’t long before Studie’s first customer of the day arrived – a rather brutal-sounding M4 from CPM Tech. These guys make stiffening plates for the underside of the chassis and they had come to Studie to have their new billet prototype steering boss test-fitted. It was cool to see that the car was also a manual.
Mounting Tyres The Right Way

As I checked out the M4 no time was being wasted on the 435i. With the suspension sorted it was on to the wheels and tyres, and again, the speed that these guys were working blew me away.

Seeing the new tyres mounted on the satin black duralumin BBS RI-Ds made the wheels look a little cooler; more purposeful if you know what I mean.

Once the right pressure was set for both front and rear it was on to the balancer to get each wheel squared up.

One thing I immediately noticed when the mechanic was mounting the tyres on the rims is that he paid special attention to line up each of the Advan balance points with the valve stem. This is something that I’m super fussy about, but in Japan I usually just get the excuse that it’s hard to do, or that the machine makes it hard to get it spot on. But at Studie, it was done without me even having to remind them. It’s small things like that that make customers come back time and time again.

With each wheel balanced it was then on to fitting the two rings for each of the hubs, as the RI-Ds have a hub-centric design.

Then, again without me specifically asking about it, each of the four BBS red center caps were precisely lined up with the valve stem. Most Japanese shops I’ve been to just click the center caps in position without bothering to look for any sort of alignment, or not even asking the customer, which makes me very angry.

Fitting was next, and at this point I was experiencing a combination of extreme excitement at seeing how damn cool the wheels already looked, and at the same time utter fear as they seemed to be sticking a little outside of the 435i’s dimensions.

However, once the car was dropped down it all seemed to slowly square up and I let out a rather long sigh of relief!

The wheels seemed to fall into the fenders beautifully, cambering inward as the car lowered. There was enough distance from the top of the arch as well as every part of the fender liner with both full left and right lock applied. But as the car settled it did look like the front was a tad too low.

There were some JDM sucking-through-teeth sounds going on at the back of the car and I was getting a bit worried. The 10-inch wide rears were right on the limit and the mechanics seemed concerned that under compression there wouldn’t be enough cambering effect to save the sidewall from potentially hitting the fenders.

A quick turn was given on the height adjuster crowns to lift the front up a tad.

Job done. The fitment and front-to-rear height ratio looked spot on and we decided to leave the rear as it was. It may look a little high, but you have to take into account that if the top is folded there is going to be a lot more weight over those rear wheels, so there needs to be some allowance for that.

The BBS lightweight bolts were properly torqued and we were pretty much ready to go.

Before the car was taken out for a drive, the Studie guys quickly plugged their laptop into the OBD-II port.

I had asked them if they could please remove the speed sensor that blocks the navigation options from being accessed during driving. Doing this also allows me to watch digital TV and DVDs while driving, but that’s purely to keep my son entertained on longer trips. They even unlocked the daytime running light option which is usually only available on those markets where DLRs are a legal requirements, So now, if the option is ticked on in the setup menu, I can have the LED angle eyes on at full brightness during the day, and have them automatically dim once the sensors detect it’s dark enough to switch on the position lights.
Satisfaction Achieved

After a quick test drive around the Fuchu area it was concluded that there was no real danger of the tyres ever rubbing at the rear – maybe only on the hardest of compression at high speeds. So yeah, that’s definitely not happening in Japan where traffic moves in slow motion.

To say I was content with how the whole car turned out, would be a rather big understatement.

I can’t stop looking at the damn thing and I’ve actually been getting quite a few people on the street giving me the thumbs-up and striking up conversation about the wheels and how evil the car looks. That’s something that just doesn’t happen in Tokyo if you drive sometime like a Skyline GT-R, which is just seen as a hashiriya, or tuner car.
I now have to drive the car around for 500-600km to allow the suspension to settle properly, and then I’ll return to Studie AG for a full laser alignment.

Here’s a picture to give you a quick idea of what the car looks like during the day with the DLR option turned on. You can actually code the system to dim the brightness if need be, but I’m satisfied with how they look. They are visible but not annoying to other road users, which is far better than those people in Japan that insist driving with their HID fog lights on during the day. One thing that annoys me, however, is that orange filament bulb for the front indicators. It just reflects around the entire reflector and gives the impression that the whole thing is orange. I’ll have to find an powerful amber LED replacement to fix this little issue.

The orange part in the rear taillights makes me very angry too. Hopefully some red transparent vinyl and a bright amber LED will allow me to achieve the full red look. Maybe there’s some BMW owners out there that have some pointers?

I’m pretty sure the suspension has dropped a little in the last week, so Studie will have to square things up again at the time of the alignment. There’s no rubbing at all, so height-wise I might just leave it as is.

I haven’t had a chance to drive the car much but, I did take it out one night for a quick blast around the C1, and the KW Variant 3s combined with the sturdier, yet more compliant feel of the Advans, have really transformed the car. The 435i is not a light car, but it now feels more nimble, precise, and far more planted, with even better steering feel. It also stays nice and flat through the corners. But I’ll have to put it up to the real test of a proper outing on the Hakone Turnpike and see if I can nail a nice setup by fiddling around with the rebound and bump settings. For now though, I’m content with just admiring it sitting in the driveway.
Words / Photos Dino Dalle Carbonare